Thursday, June 15, 2017
Wednesday, January 11, 2017
Happy New Year!
Well, 2017 is under way! I've been experiencing computer trouble. Then I had an extended illness. What a way to end 2016. I'm hoping to purchase a new computer this month. I love my tablet, but is really hard to upload photos and write tutorials or long articles. Here's to better times, blogging, creativity and health.
Friday, June 24, 2016
Donating to Others

Two of the young moms at our church are working with the teenage girls this summer on a study to help them make good choices in their lives. They have homework and are given points for several steps they make in this study. The steps are given a ticket value. These young moms have spent their own money to purchase several "prizes". The girls receive points and tickets every week. They are able to "shop" through the prizes and spend their tickets.

To help these young moms with their budget, I made single sheet note cards. I used these colorful blank note sheets and added the seahorse to one set and the sand dollar to another. There are 8 cards and envelopes in each set. I love donating to a good cause and I really feel these young ladies are a very good cause.
I always photograph my work and sometimes make notations to identify donations. I know there are thousands of other artists out there that donate, too. I feel we are part of a community that makes someone's day a little brighter. If you have a story for me, please leave a comment. Thank you for visiting my blog!
Tuesday, June 14, 2016
To Stamp or not to Stamp........

Simply using a border punch at the top and bottom of the gorgeous decorative paper by DCWV gives an elegant touch to the front of the card. This stack is called: "Art Collage". It contains some fabulous color combinations and patterns. It also has pages that have collage images on them. My motto has always been: "Let your paper do the work for you"; and this stack most certainly does that!
Thanks for stopping by. See you next time!
Thursday, June 2, 2016
Vintage or Shabby?
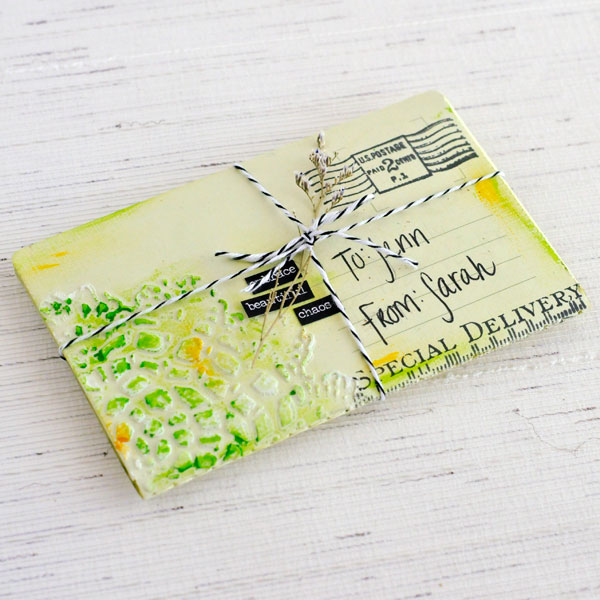
I love the look of vintage things.....especially cards, albums, journals, etc. I seem to have trouble going all the way.............all the way to "Shabby Chic". As I work on cards, albums, and journals, I always think I'll make something in the shabby chic style. But as I start adding papers, lace, and embellishments to the work, I feel like I'm overloading it. Maybe I think it's starting to look shabby, but not chic. I realize this card falls far short of being in the category of Shabby Chic, but at this time in my creative box, I haven't been able to push the sides a little wider or even get out of the box. I think I'm going to have to immerse myself in Shabby Chic literature, photos, cards and journals to push through.

I do like using text as my background. There's something about the written word that has always intrigued me. (My friends call me a "word" person :) Flowers always seem to recall the by-gone era when ladies dried their flowers for use on letters, cards, albums and journals. It is an endearing addition to any art work.

Butterflies are also an image that one sees often in vintage works, whether on a personal letter or in advertisements or on postcards. These beautiful gold butterfly embellishments come by the sheet full from my dear friend Susan at stampdiva.com.

Lace seems to be the embellishment of choice on all vintage or shabby chic pieces. We seem to have a large abundance of it on the market and stashed away in all those boxes and drawers. Artists even join in swaps with other artists and thereby increase their array of laces. I do like the elegance that lace provides for any art piece.

This vintage photo copy of a lovely young lady comes from RedLeadpaperworks.com They have quite a variety of collage sheets available in the online shop. I really like the hand-written letter behind her and that the "bye-bye darling" showing across the front of her.

Thursday, May 19, 2016
Photo Art Journal


I love the numbers on these recycled ties. This "door" did not have any, but the "chimney" had some nice ones. This is also a painted page.


Thus ended 17 yrs of home schooling! Mama got to retire!!!
This is another page covered with pieces of scrap card stock.


Tuesday, May 17, 2016
Published in Take Ten Summer 2016 - Coming June 1


I am always thrilled to received a magazine from Stampington & Co! I feel very privileged to be published in any of the magazines. Thank you, Devon Warren and staff for putting this magazine together for us.
Another sign of Spring......
The Golden Finch is back.....but not in the numbers we have had here in the past. There were times that the flocks would completely cover our front yard. This year's flocks barely lined a portion of the driveway. The thirsty little guys lined the watering pan I have sitting on a slab near our outside water faucet.

These little guys are really light up the yard when they land. They were busy eating the bud covers that had fallen from our elm tree. It really saddens me to see such small numbers. I wonder what's happening to the Golden Finch population? A topic I will be investigating.

This photo shows birds on both sides of the drive. It is such a small showing compared to previous years.

This single little Finch was sitting above the watering pan waiting for a place to perch. It was like watching musical chairs as one batch of birds would fly off from the pan and another four would immediately take their place at the watering hole.

Monday, May 16, 2016
Iris Springs Continues
As my bed of purple irises began to die out, my white irises, old-fashioned bronzes, and yellows began to bloom and really put on a colorful show.

In the background behind the white irises, my day lilies were shooting up buds on long stems. These are dark yellow trumpets.......small but beautiful.

The white irises have a small showing of yellow beards sticking out from the centers and down onto the falls.

These old-fashioned bronzes were planted here by my mother-in-law over twenty years ago. Some years they make no showing at all, but with all the rain they really came out for a great display.

This is another iris I inherited from a friend. They really brighten up the corner of the yard where they are planted. They always seem to be the last to bloom. They usually take me by surprise! I nearly forget them and then, voile! there they are! It's almost as if a light has been turned on in that corner of the yard. I have truly enjoyed this Iris Spring!

Iris Spring
My irises went crazy this Spring! Very little care goes into this marvelous bed of irises. I inherited these lovely flowers from a friend who had become allergic to grass and leaves (almost anything outdoors) due to some medication she was on. She had about 300 irises. I didn't bring that many to my yard, but at least 100. Over the years they have died out, or the hybrid ones have reverted back to white. But the irises in this bed continue to hold their colors. It is such a great array of purples and violets.

The close-up here shows the various placements of the color in centers and the "falls" (the petals hanging down). Two of my favorites: 1) lavendar centers with purple falls; 2) purple/white centers with white falls outlined in purple.


The irises above that have not unfurled are white with lavender outlines in the centers and on the falls. Below is a close-up of one that has purple outlines and has unfurled.

Below is a photo of one of the lavendar ones as it begins to unfurl.

Saturday, April 9, 2016
Stampington's Letter Writing Contest
Check out their new spring designs here: www.expressionery.com/estore/?expblg. Wish I had seen this earlier, but, alas, I have been neglecting my blog and emails this week. "She who sleeps, later weeps!" (my own saying....often said to myself! LOL).
My grandmother and I corresponded by letter for many years before her death during my second year of marriage. I started writing letters to her as soon as I could print words. She (and most of her sons) had beautiful handwriting. I am so glad I have letters from her in that gorgeous script. I also have writings of my father and uncle who inherited this gift from her.
I am going to make this letter-journal to send. I have several friends that I have corresponded with for many years. I really believe this is a dying art and I truly enjoy writing. Handwritten notes/letters are so special to me.
Join in! Leave a comment if you're going to join. I'd love to know! DEADLINE 4/20/2016. See all the details here:
stampington.com/blog/2016/04/05/mad-celebrating-national-letter-writing-month-crazy-friends-expressionery-giveaway/?utm_source=Stampington+%26+Company&utm_campaign=3aff30935d-Creative_Impulse_2016_04_08&utm_medium=email&utm_term=0_916c207796-3aff30935d-7697705&mc_cid=3aff30935d&mc_eid=57e99b647a
Saturday, April 2, 2016
Published in The Stampers' Sampler

(I really enjoyed making the little banner for their party. :)


Okay all you shy, hesitant closet stampers.............start submitting those little creations of yours! I know Devon and the gang are anxious to see what you've been up to! Thanks again, Devon to you and your staff for working so hard to keep these magazines going.
Happy creating! sharon aka inkybru
Published in Take Ten

This card was sent in for the design challenge that Take Ten always has in their isssues. I love doing them as I like a challenge! But, alas, I don't always have time to get them in by the deadline.
So, I was very glad to see that this one not only made it, but was published!
These are some of my favorite colors: the turquoise, lime green (or chartreuse, if you prefer :) and orange. The paper I used contained all these colors! How exciting is that?! The reverse side had the lime green design and was perfect to show off the orange dragonflies I stamped and cut out to add to the circles. I love the tiny blue bird washi tape that I used at the top. I thought this made a delightful card.
Thank you, Devin Warren and all your staff at Take Ten for the great work you do!
Happy creating! sharon aka inkybru
Published in RSM

I've been a little slow at posting some of my latest published cards. This one was published RubberStampeMadness' Spring 2016 issue. My very first publication was in RSM in 2003! WOW! Thirteen years ago! Goodness time does fly when you're having fun. LOL The theme for this submission was filmstrips. We were given some templates to use if we desired. I have this wonderful rubber stamp of this man. Well, I say man, some say "men". Sorta of like, tomayto, tomahto? LOL I have always thought the man on this stamp could have been a 30's or 40's movie star. I knew immediately that I was going to put him into the filmstrip. The stamp also is called "One man show" (the reason I think it's man instead of men.....hehe).
I had some decorative paper that had filmstrips on them, so I cut a strip to go on the left side of the card. I copied the template on card stock, stamped the images, cut them to fit the filmstrip and attached them. I also cut a piece in a different color to layer with the filmstrip to make it stand out. I hand cut stars from the same piece and glued them around the card as shown. I used embossing powder to make the "Congratulations!" really pop. I was very pleased when Roberta notified me that my card was being published. Thank you, Roberta, and all your staff for continuing with RSM!
Happy creating! sharon aka inkybru
A Bird in the Hand

Anyone who knows me is aware that I love birds and aqua: pale aqua extending to turquoise. I have quite a collection of chipboard, ribbons and washi tape. I really wanted to use some of stash and thought this would be a great way to utilize it.
I also have a die for cutting birds (Sizzix). This particular die has two birds. I love to cut these birds on double-sided papers, and that way I can choose whether to have them facing each other, or wings to be different, etc.
To start, I painted the large piece of chipboard with a thick acrylic paint ( Dina Wakely). I chose the turquoise for the panel to allow it to be my sentiment background.


Caribbean. I also adorned this butterfly with a rhinestone.


At the bottom of the tag I sewed on a strip of ribbon lace and then a ribbon over the top of the lace. I attached the organza flower to left side of the ribbon. The little bird at the bottom was also part of the decorative paper.
I have always said (to ANYONE who would listen....LOL), "Let your paper do half the work for you". Here is a prime example of how the paper fit into my theme for this tag. Keep your eyes open to all the possibilities! Thanks for dropping by. Happy creating! Sharon aka inkybru
Tuesday, March 15, 2016
Valentine pockets............


This was such fun and very relaxing. I had not felt well most of January and it was refreshing to be sitting at my art table creating something that I hoped would bring pleasure to another. If you are not familiar with Red Lead, go visit Chris and Sharon at: www.redleadpaperworks.com.
Canadian geese.......


Subscribe to:
Posts (Atom)